How to solve it
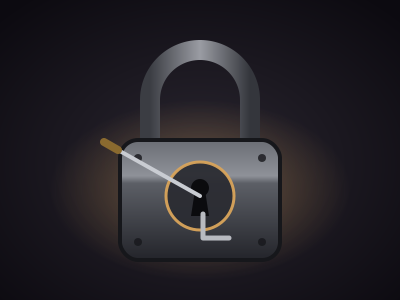
You get a lock plate with its pins cut away so you can see them, a tension wrench and a pick that sweeps around the keyhole. Every pin has a sweet spot somewhere along that sweep. Find it, turn the plug, and the pin sets. Set every pin and the lock opens.
Before you start
Choose how to go at it.
- Use Thieves' Tools rolls your Thieves' Tools check against the lock's DC. Every point you beat it by widens the sweet spot, and you get more picks: 3, plus 1 for every 5 points over the DC. A natural 20 opens the lock on the spot. A natural 1 leaves you with the narrowest target and a single pick.
- Try without tools is always allowed, but you play at the hardest setting with one pick.
Picking
- Aim the pick with the pointer, or with the arrow keys (hold Shift for bigger steps).
- Apply tension by holding the mouse button, Space or Enter, or the Hold to turn lever.
In the sweet spot the plug turns all the way. Off it, the plug turns a little and jams, and the wrench trembles harder the closer you are. Let go quickly and nothing is lost, so you can probe. Hold against a jam for about half a second and you strain the pick. A near miss strains it a little, a wild miss strains it more, and enough strain snaps it.
When your last pick snaps, the attempt is over. It costs one of the puzzle's attempts and you go back to the start, choosing tools or no tools again.
Setting it up
- Lock DC runs from 5 to 30, and difficulty sets it to 10, 15, 20 or 25. The DC also decides the pin count unless you override it: 2 pins up to DC 10, then 3, 4, 5 and 6 as it climbs. DC 15 to 19 is a classic four-pin lock. Setting the DC also points the puzzle's Just roll check at Thieves' Tools with the same DC.
- Style is Sweet spot or Pin tumbler. In Sweet spot the pins bind front to back and a snapped pick keeps your progress. In Pin tumbler the binding order is hidden and a snapped pick drops every pin. Hard and Deadly locks default to Pin tumbler.
- Pins and Picks override the numbers that come from the DC and the roll.
- Pick strength is how many strains a pick takes before it snaps, from 1 to 5. Easy gives 3, Deadly gives 1.
- Sweet spot settings control how wide the target is on a bare pass, how much each point of margin adds, and the narrowest and widest it can get, all in degrees.
- Sweet spots let you place each pin's angle by hand when you write the solution. Otherwise they are spread at random. You can also choose Set the solution by playing on the board and pick the lock yourself.
A lockpick is a one-person job. It supports One player drives, the party watches and I operate it, players watch, but not everyone at once. Rule out a wrong option eases the current binding pin into place.
Where it fits in a campaign
- The rogue's moment. The party has to get into the magistrate's office before the guard changes. Put a timer on the lock and let the table watch the rogue sweat.
- A cell door, no tools. The party wakes up in a slaver's hold with their kit confiscated. Someone can still try without tools, with one bent nail of a pick.
- A masterwork lock. A Deadly pin tumbler on a dragon's strongbox. A low roll means one pick and no margin for error, which is exactly how a dragon's strongbox should feel.
Running any puzzle
Every puzzle type is built and run the same way. The guide above covers what's particular to this one.
Write it once
A puzzle is a compendium entry. Create a new Puzzle in one of your compendiums and choose its type. The form has four tabs. Overview holds the type, a spoiler-free flavour line, an optional cover image and the settings below.
- Who operates it is one player driving while the party watches, everyone operating it, or you operating it while players watch. You can always operate it yourself, whatever you pick.
- Difficulty is Easy, Medium, Hard or Deadly. Changing it rewrites the settings that tier controls and leaves your solution and text alone, so pick a tier first and fine-tune afterwards.
- Solution is either written by you or generated each time the puzzle is placed. Generated is the default, so players who own the puzzle can't look up the answer. Reroll the solution each session gives a recurring puzzle a fresh answer every session.
- Limits set a maximum number of attempts, a time limit (with the option to show players the timer) and a lockout. With a lockout, running out of attempts locks the puzzle for a while. Without one, the puzzle fails.
The other three tabs are Mechanism, which holds the settings described above, Hints, where you write up to ten hints to reveal from the board when you choose, and Presentation, for the skin, the title, an intro and the text players see on success or failure.
Put it on the board
At the table, open the Puzzles tab in the dock and drag a puzzle onto the map, or click it to drop it in the middle of your view. That makes a copy for this table only. Its progress lives with the table, and the compendium entry stays untouched. Most puzzles sit on the map as an object. Pressure plates and rune sequences can also lay tiles on the scene for tokens to step on.
There's no separate step to start it. The first player to touch it starts it. In single-driver mode, that player takes the controls and everyone else watches every move live.
Run it live
Right-click a placed puzzle for the DM's controls. The most useful ones:
- Reveal a hint and Rule out a wrong option for a party that's stuck.
- Open it by magic (Knock) or Force it open when a spell or a crowbar should simply win.
- Give one more attempt, Pause the timer and Reset.
- Approve the solve or Reject the solve, with an optional reply, if you asked to approve solves first.
- Set up… to change this table's copy and choose what happens When it is solved and When it fails. Outcomes can open or unlock a door, reveal a token, object, handout or another puzzle, play an effect, post to chat, roll damage or start combat.
Skip the minigame
Not every table wants to play every puzzle. Set a placement's Just roll option to Always and the puzzle shows a single Roll to resolve button instead. Players roll the puzzle's Just roll skill against its DC, which defaults to Investigation at DC 15. A pass solves it and a fail costs an attempt. Set it to Never to make the party play it out.